
Adding a Printer (Windows)
1. Install a Printer Automatically
These steps require you to be connected to the wired network in the building you are attempting to add the printer.
WiFi will NOT show the printers for the building.
- Open Settings or press Win + I
- Select Bluetooth & Devices
- Select Printers and Scanners
- Select Add Device
- Select Search for Devices
- Select
WorkUSB orSchool,Network, located next to 'Show Printer and scanners associated with my' If you do not seeWork or School,please see the troubleshooting section.
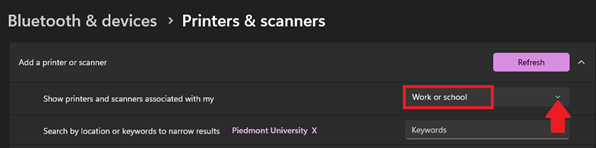
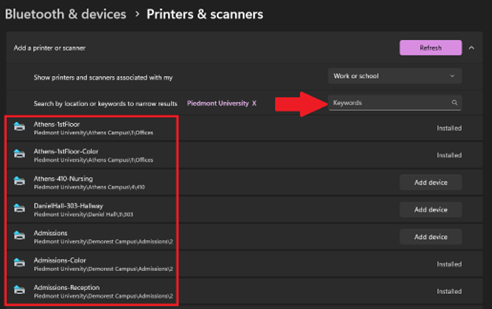
- It is recommended to search for printers by using the room number

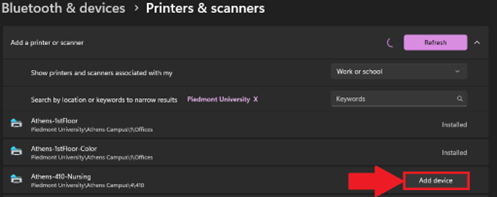
Your computer will take a moment to install the
2. Printing Documents
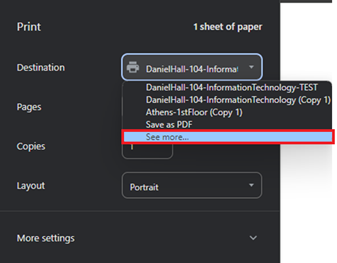
- Use CTRL + P to print
- Toggle the drop-down next to Destination
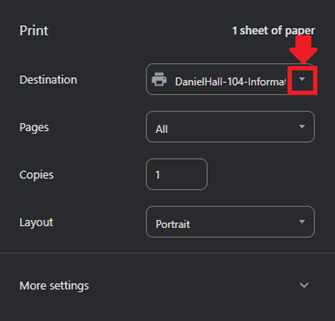
- Select the printer that you added in the previous section.
- If you do not see your printer, you may need to select See More from the drop-down menu
- If you do not see your printer, you may need to select See More from the drop-down menu
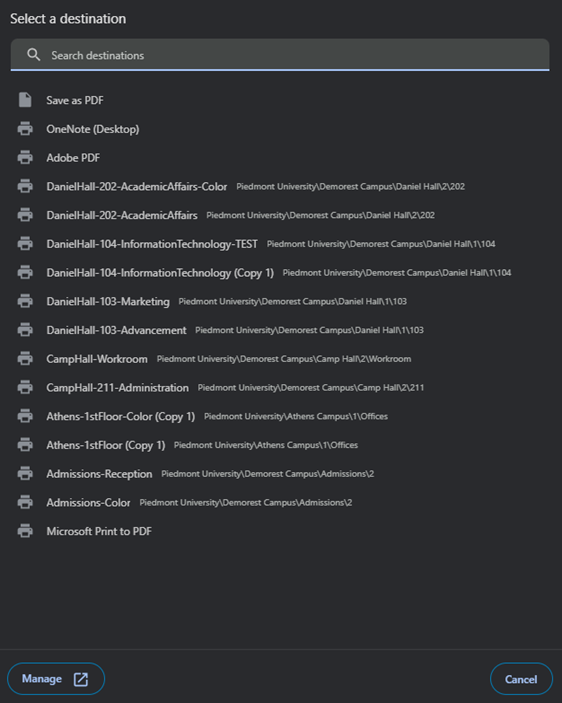
- A new page will open containing a full list of printers.
- If you do not see your printer, please submit a helpdesk ticket.

- If you do not see your printer, please submit a helpdesk ticket.
- Once you've selected your printer, select Print to send the document to the printer.


3. Troubleshooting
MissingWork or SchooloptionOpen Windows Settings
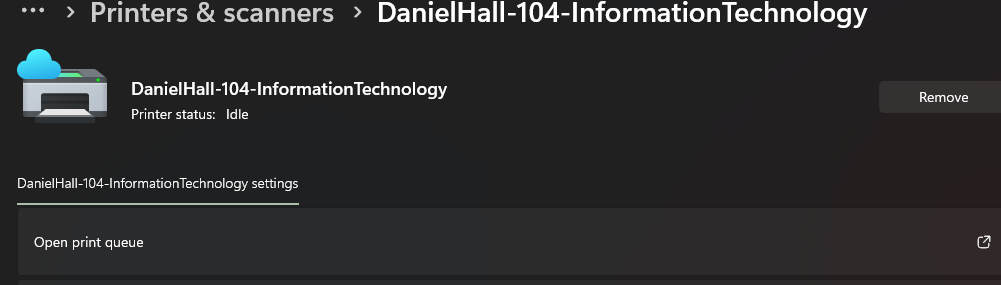
- If you are having issues printing, try removing and re-adding the printer.
- Open Settings or press Win + I
- Select Bluetooth & Devices
- Select Printers and Scanners
- Select the printer that you are attempting to print from.
- Click "Remove."
- To reinstall the printer, follow the instructions above in section "I. Install a printer."
- For all other issues please submit a helpdesk ticket

💬 Department Contact Info
For any issues or questions regarding printing, please contact IT support.
📞 (706) 778-3000
✉️ Department@piedmont.edu
🔗 https://www.Piedmont.edu